
From old ancient table to new vintage desk table
FROM OLD ANCIENT TABLE TO NEW VINTAGE DESK TABLE

Today's project will be a little more challenging than the last.
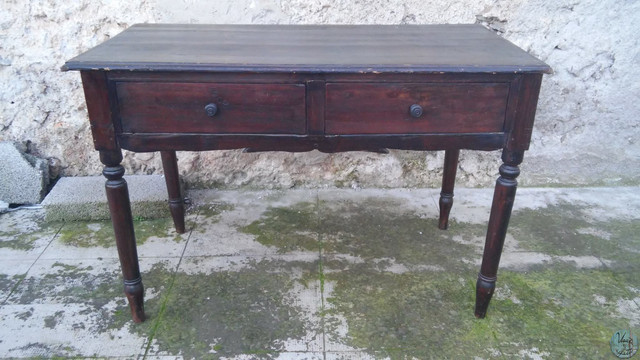
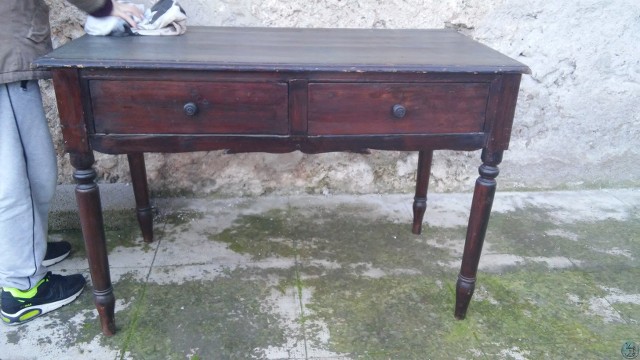
We founded desk table on internet: a nice desk with a huge potential.When we went to see it the initial excitement has turned into despair. The desk had obvious structural problems: both rear legs were crooked and also well bonded. Result: the table had a slope that made him not quite usable!
The price however was very inviting and so we decided to take it anyway.So, let's start!
To get a good job, respecting all the shutter speeds the time required will be about 1 week.
STEP 1: FIND THE DESK TABLE
Find a desk is not simple and the prices are pretty high. But you might look for a table, not too big, and the prices are significantly lower.A table can easily be adapted as a desk, if is not too big. As well as a large desk can become a table, or from a table can be derived a lower table.
For a desktop search will always recommend to look for in flea markets and on ads used specialized sites. Always check the condition of the cabinet. Look if the wood is not too damaged, or if there are any missing pieces that should cost too much to replace. Also check the presence of holes caused by termites,
because not always the problem is solvable and the work
would be much longer. In our search we were pretty lucky. The desk table we purchased is a rather antique table, from the early
900. And despite the obvious structural problems the price was very
good.
STEP 2: THE MATERIALS
Now let's see what it can serve you:
- - alcohol and patches;
- - putty for wood (in this case it's good white);
- - glue for wood;
- - sander and sandpaper (80, 120, 240);
- - primer paint matt and colorless (we recommend the water and long-lasting);
- - enamel teal blue (or alternatively any other color);
- - solid wax matt and waterproof finish (still water);
- - brushes. Only need two, one medium-sized and some brush to treat the details. (Remember to wash them immediately with warm water and mild soap);
- - knobs, vintage style;
- - gloves, face mask, suitable clothing.
At this point you will have everything you need to get started. So let's go!
STEP 3: ANALYSIS AND RESOLUTION OF STRUCTURAL PROBLEMS
Clean the desk table with alcohol and patches to remove any dirt.
 Remove the drawers from the table, after checking that they slide well on their rail.
Then analyze the legs of your table. In our 2 of 4 legs were crooked and firmly glued to the structure of the table. We had to remove the glue, place them correctly and stick them again.
Do not have rush in these cases. Use alcohol and help with a utility knife or a pin started to remove the glue. To be able to remove the leg from the structure all the glue has to go in contact with the alcohol to melt well. Depending on how much glue is present this operation will take you away a long time and especially patience!
Do not overdo it with alcohol because excessive amounts of glue isn't good even if it's the most volatile of the alcohols.
Once extracted legs away, wait to dry thoroughly, even clean them with a piece of sandpaper. All residues of glue must be removed.
Our table had another problem: removed all the glue and clean for good
legs, we realized that the structural problem was due to lack of small
pieces of wood. In these cases (unless you want to replace the bad leg) you have to reconstruct the missing parts with putty. If
later you are going to apply an enamel you can use a white putty, otherwise
you have to use the same colour you are going to apply.
Reconstruct the missing parts, and wait that putty is dry.
N.B. Put on the cabinet copious putty because when it's drying putty retires and then you would have to fill it again. Pass a piece of sandpaper to remove the excesses and to bring the
filler level of the wood. Only when everything is dry you can re-position
legs and glue. Two people are better to avoid mistakes!
STEP 4: REMOVING OLD PAINT
Remove knobs from the drawers. If later you are going to apply a handle as in our case, you will have to close old holes with a little quantity of putty. Arm your sander with 120 sandpaper and remove the old paint from the shelf. For legs and edges you have to use sandpaper and your hands! Remove all the paint and check that there are no other cracks or holes that you will go eventually fill with putty.
IMPORTANT: when removing paint you'll have to wear a protective mask for nose and mouth. The ideal would be a mask with filters. Always use gloves to protect your hands and a face mask.
After cleaning the cabinet and ass again the sandpaper finer grained.
STEP 5: APPLY PRIMER AND NEW PAINT
Clean everything well. Apply a coat of primer on cabinet. Let dry it for good. I recommend you to follow the instructions on the packaging carefully and respect all dry time.

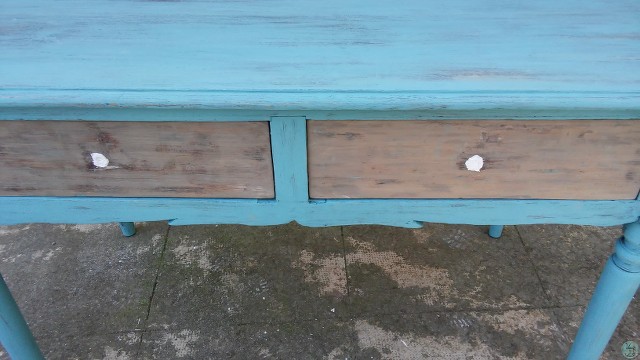
Apply on the structure of cabinet the enamel teal blue and with a small brush make some little marks on the drawers.
When the first coat is completely dry pass sandpaper to remove any imperfections and after apply the second coat of color.
Let dry for good.
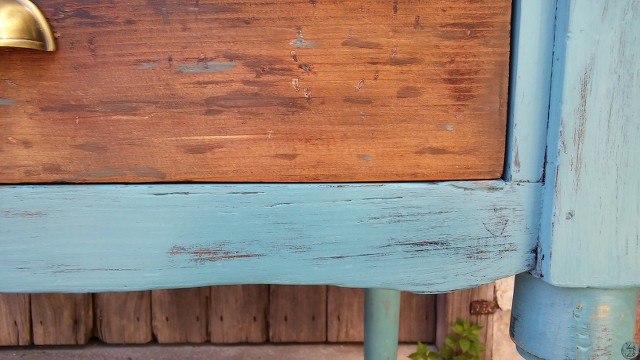
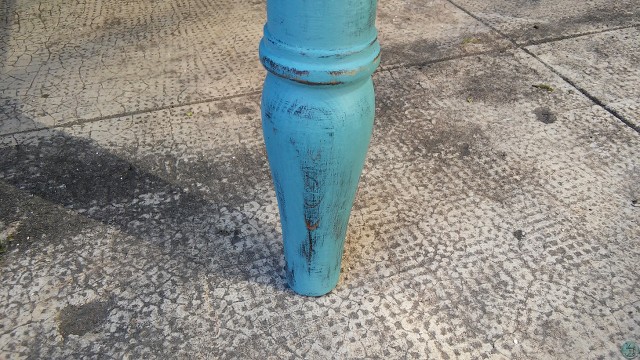
Council: sandpaper, primer and paint should always be applied in the wood's fibers direction. To get the shabby chic effect, take a small piece of fine grit sandpaper and pass in some places, always following the wood's fibers. Do not overdo it or you will remove all the paint applied before!
Passing the small piece of sandpaper will remove the top layer of paint highlighting what is left below.
Clean with a dry patch to remove dust residue of enamel and put the solid wax with a clean patch, follow the instructions on the package (normally pass a thick layer of wax, expect dry time and pass back a piece on cabinet).
Let dry for good.
Council: sandpaper, primer and paint should always be applied in the wood's fibers direction. To get the shabby chic effect, take a small piece of fine grit sandpaper and pass in some places, always following the wood's fibers. Do not overdo it or you will remove all the paint applied before!
Passing the small piece of sandpaper will remove the top layer of paint highlighting what is left below.
Clean with a dry patch to remove dust residue of enamel and put the solid wax with a clean patch, follow the instructions on the package (normally pass a thick layer of wax, expect dry time and pass back a piece on cabinet).
STEP 6: ASSEMBLING FURNITURE
For the application of the handles we have chosen we have to make 2 holes for drawer. I recommend you to take the exact point of the center and use the tip for the drill suited to wood.
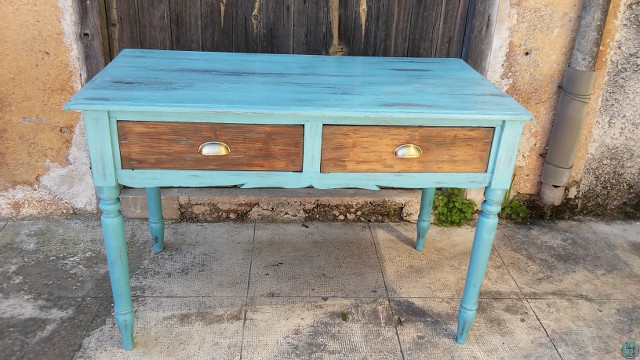
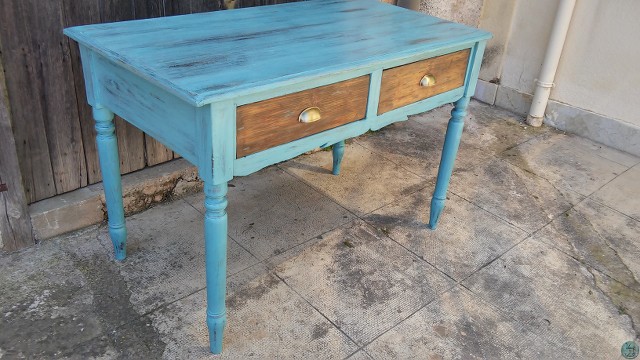
Here is the final result.
Each piece of furniture has its own story and is not always easy to explain how to achieve it, but we are here for personalized advice!

0 commenti: